Sabtu, 30 April 2016

Shifting tilapias

So the last weekend was filled with action as i noticed the solidwaste in my 500 liter system is creating a problem.  This system now has around 48 tilapias and some of them have become bigger than the others. So i decided to move 10 of the big ones to my second system.

 Catching them in the small fishing net was a little tricky, since the fish had become bigger then the net i had with me. So i had to get a bigger net. In the aquarium store i noticed lots of big fishing nets like the size of an A3 poster. I always wondered who would buy such big nets .... well ... i am well on the way to getting one soon :)

Some of my tilapias have become 8 inch long, another eight months they should be plate size or at least  0.75Kg to 1Kg each.

Here is a short video of how i moved the tilapias.


Read More..
When Katies out of town, as was the case this last week, the kitchen experiments around here tend to get a little more curious.  In particular, the opportunity exists to use up things from the freezer that arent allowed in the kitchen at the same time as Katie.  Not that shes particularly picky, but its been a busy week nonetheless.

First, the last of the frozen wild greens are now used up.  There were a couple quart bags of dandelions and one of sorrel in the freezer.

If memory serves, one bag of dandelions was blanched before freezing, and the other just soaked to extract the bitter taraxinic acids, then frozen without blanching.  Both seemed to be functionally equivalent to frozen spinach, except slightly bitter (in a good way).  In the future, we definitely wont bother with the blanching!

The sorrel also seemed to be functionally equivalent to frozen spinach.  This one we didnt blanch because heating the fresh sorrel makes it turn a weird green-gray color.  Interestingly, after it came out of the freezer, it stayed green in the frying pan.  There was only one bag of sorrel, though (no replicate in this experiment!), so well have to try again next year to try to reproduce the lack of color change on heating.

One staple dish around here for frozen greens is a a mix of the sauteed greens, potatoes, plain yogurt (or sour cream if youre trying to get some extra calories in), and seasonings.  Pretty good stuff.  The combination of bold flavors also makes it a good hiding place for odd cuts of meat that some of the Homestead Laboratory resident scientists would object to eating as a featured course.

...such as this delectable bit, which was just as tender and scrumptious as the Curious Coconut promised.  Any guesses what it is? (Hint: click the link.)

An approximate total recipe for this iteration of the dish is something like 10 oz greens, 5 cups cubed, cooked potatoes, 1 lb cubed meat, 2 cups plain yogurt, and salt, pepper, onion powder, garlic powder, basil, and cayenne pepper to taste.  Topped with some melty cheddar, its a dish fit for kings.  Or at least, the king of this castle when the queen isnt around.

Were also big fans of cramming vegetables into our desserts, although Katie tends to be less excited about untested combinations.  For example, the picture shows the makings of a carrot-apple cider-caramel ice cream smoothy.  It took about three medium carrots (which the kitchen scale said was 5.65 oz), about 1.5 cups apple cider, and three big scoops of salted caramel ice cream.  Carrots got chopped in the food processor with the apple cider, then ice cream jumped in and everything got processed until smooth.  Before you wrinkle your nose, keep in mind that carrot juice and apple juice are no strangers to each other in the juicing world (search carrot apple juice to find a litany of recipes), and apples and caramel are one of the best flavor combinations of all time.  (And that is a scientific fact!)  It actually tastes mostly not like carrot.
Thats a big, tall glass of yum, right there.  Yup.

What kind of experiments have you been working on in the kitchen?


Read More..
We ran out of store-bought salt the other day, right before we were about to do some baking.  We had some big salt rocks in one of those hand grinder things (like the kind that the waiters use to grind pepper onto your salad at fancy restaurants like Olive Garden), but when were baking and we want a teaspoon of salt, its hard to tell how much weve ground up.  Its much easier if we have a container of pre-ground salt that we can take from.  So, we got our grain mill out again this weekend to take our salt rocks and turn them into salt grains.  (For what its worth, weve now used our grain mill on eggshells, sugar, and salt, but not yet grain!)


This is part of a batch we collected off Mount Desert Island in Acadia National Park, Maine.  From one gallon of sea water, we got about 75 g salt (around half a cup).  Since the salinity of seawater in that area is 31-35 g/L, we should have gotten ~118-133 g of salt, so our yield is curiously low, unless we used some of it for other stuff we cant remember. (Which is totally possible.)  We dried it in a 9 x 13" pan on top of the fridge, and finished it off in the oven.  Kind of cool to watch the crystallization process.  In an earlier batch, we dried driving off the last of the water in a plastic container in the microwave.  DO NOT do that...it took less than ten seconds for the plastic to melt and stink up the kitchen!

Anyway, the granules here are much bigger than wed like.  In the photo, were trying to sieve it after grinding it with a mortar and pestle.  The old M&P didnt work very well for the single crystal chunks.

But those crystals are no match for the grain mill!

When all was said and done, we had a nice bowl of white powder. Our home-dried sea salt stuck in the mill a little more than the other salts we tried (we found a container of large-grained pink Himalayan salt in the cupboard also), so maybe we didnt get it quite as dry as we thought we did.  [Ooh!  Here comes Katie!] Hey Katie, grab a spoon!  Want to try some of this fresh-ground sugar?

Post-grinding, back into the canning jar from whence it came.  We made sure to clean up the grain mill real good afterward because chloride ions and steel dont get along very well.

One other bit of info we discovered while following our curiosity on this post is that sea salt doesnt have much iodine in it. (i.e., its I content is way lower than iodized regular salt.)  Thats kind of disappointing because we were hoping that if we took a trip to the ocean once a year or so to make our own sea salt, we wouldnt have to buy salt at the store and could still avoid catching the goiter (or other iodine-deficiency disorders).  But it looks like well have to collect the seaweed and fish, too, to make that happen.  Or eat plenty of cranberries, which seem* to have a high iodine content despite being mostly grown in the middle of the goiter belt.  Possibly because the region theyre grown in has a high organic matter content in the soil, which is very good at capturing atmospheric iodine (e.g., as CH3I) and storing it in a plant-accessible form.


*Many online sources claim that cranberries have up to 400 ug iodine per 4 oz serving, but we couldnt find the original source of that number.  A paper from 1928 gives a value of 35 ppb iodine (ppb = ug/kg), which works out to 3.97 ug iodine per serving:


Wethinks someone may have done a faulty conversion of units along the way, which was then propagated by less-than-diligent authors.  Another reminder to take internet-based information with...a grain of salt.  A more recent source gives 100 ug I /kg cranberries, or 11.3 ug/serving, which is on par with eggs, freshwater fish, and other fruits--and still nothing to sneeze at, accounting for ~7.5% of the recommended daily intake (RDI).  Since three cups of cranberries = 12 oz, at that rate, all youd need is 2.2 pans of yuletide strata per day to completely satisfy your iodine RDI!

 
 How do you cover your salt (and iodine) needs on the homestead?  Let us know in the comments section below!

Read More..

Jumat, 29 April 2016

If you are just getting started with aquaponics, you are probably reading all you can about the miracle of the bell siphon.

Well, they arent miracles they are physical science in action and while they do fall in the nifty, keen-o, fine-o category we have found several problems with them.

Add one more to that category.........root intrusion from the grow bed!

We recently stepped out of town for a little over two weeks.  We had someone periodically peek in on our systems and feed the fish a few times.  We were shocked when we got the panicked phone call that one of the systems was over-flowing on the grow bed and loosing water in the fish tank.  While we had a good bit of rain in our absence and that might explain an over-all higher water level we do have overflows installed to take care of heavy rain.  Also, rain wouldnt explain why we would loose water from the fish side of the system.  What fun to troubleshoot from 1500 miles away!

Every thing was humming when we left town.  The plants were uber happy and the fish appeared to be happy (hard to tell when they are smiling) so all should have been good. What happened?

Well, the plants were so uber happy that they grew like crazy and even though we had the bell siphon guarded, the roots grew into the siphon itself.  The entire thing was so totally clogged with roots that the siphon could no longer drain.  Now you know it is a serious root blockage if water, one of the most persistent and powerful forces on earth couldnt make it through that root ball!

So, we will develop a new guard to protect the bell siphon from roots.  But, this has only reinforced our decision to stick with loop siphons on all of our other systems.  The design of the loop siphon does not allow for root intrusion and all of the other systems utilizing this design had no problems with roots.

So, bell = bad
Loop = good
Read More..

Original Easter Ham Strata!

Holy smokes, its Easter time! (or at least, it was last weekend.)  That means that its time to celebrate with that age-old treasure of the Waldo, WI Methodists: ham strata.  We eat seasonal stratas (whats the plural of strata?) at different times of the year, and are currently embarking on a journey to perfect one strata recipe per month.  But the month of April was easy, because it is the month in which the original strata (as far as we know) originated, and its already perfected.  What follows below is the proper way to prepare the original Easter ham strata.

Start with a layer of bread in a 9" x 13" pan, then a layer of ham, and a layer (or two) of cheese. If Katies not watching, you dont have to tear the bread into little pieces, and you can increase the cheese and ham as you see fit.  (The amounts given in the recipe are minimums.)  We used cheddar and swiss, but if youre feeling rebellious, other kinds of cheese work, too, as long as they can melt.  American cheese doesnt count because its not really cheese.

Repeat the layers as necessary to fill the pan, ending with a layer of cheese(s) on top.

Then beat together 6 eggs and 3 cups milk, along with 0.5 teaspoon onion powder, 0.5 teaspoon garlic powder, 0.25 teaspoon salt, 0.5 teaspoon pepper, and 1 teaspoon mustard.  Pour it over the cheese/bread/ham mix, and let it soak/marinate/blossom overnight, or at least several hours.  Traditionally this is done Saturday afternoon or evening by a crew of hyperactive middle schoolers, but it can also be done satisfactorily by grown-ups.

While the strata is soaking, attend an Easter Sunday sunrise service.  Traditionally, the service is in Waldo, WI, but the Red Rocks amphitheater in Colorado is an acceptable substitute.

Well, lookey here!  Its a mule deer!  How would you like to be featured in our next strata, mule deer?

After the service, lightly crunch 3 cups corn flakes and mix them with 4 Tablespoons melted butter.

Apply the buttered corn flakes to the top of the strata...

...and bake at 375 °F for 50-60 minutes until it looks like this.
Cut into large pieces and move to a plate while still steaming hot and melted cheesey.  Look!  Layers!  (Just like an ogre!)


The recipe:
10 slices of bread (at least)
2 cups shredded cheddar cheese
2 cups shredded swiss cheese
3 cups ham, shredded
6 eggs
3 cups milk
0.5 teaspoon each of onion powder, garlic powder, and black pepper
0.25 teaspoon salt
3 cups corn flakes, lightly crushed
4 Tablespoons butter, melted

Layer the bread, ham, and cheese in a 9" x 13" pan, starting with bread and ending with cheese.  Beat together eggs, milk, onion powder, garlic powder, pepper, and salt.  Pour over mixture and set in fridge for at least 12 hours, preferably overnight.  Attend Easter sunrise service.  Mix together melted butter and corn flakes, spread over top of bread-ham-cheese layers.  Bake at 375 °F for 50-60 min, until corn flakes are more golden brown than they started.


How do you celebrate Easter?  How much ham strata does it involve?  Let us know in the comments section below!


Read More..


Picture (left to right): Rev. Ron Brooker (retired pastor, member of Peace Lutheran Church, and member of the Lutheran Advocacy Ministry-NM policy committee), the Rev. Jared Carson (pastor of Peace Lutheran Church), Ellen Young (writer, member of Peace, and an advocate active in LAM-NM and Bread for the World). 

Display at Peace Lutheran
Judy Messal, chair of the Lutheran Advocacy Ministry-New Mexicos policy committee (standing at the far right in the picture), offered these remarks at the ceremony where members of Peace Lutheran Church were honored for their advocacy work.  The award presentation was part of LAM-NMs annual bishops luncheon in Santa Fe on Thursday, Feb. 4, 2016.  (Peace Lutheran Church as been participating in Bread for the Worlds Offering of Letters.

(In 2016, members of the church wrote 87 letters to Sens. Tom Udall and Martin Heinrich and Rep. Steve Pearce urging for the Child Nutrition Act to be reauthorized).

It is my great pleasure to speak about Peace Lutheran Church of Las Cruces: this years recipient of the Chris and John Haaland Advocacy Award. The award was created to honor the Haalands, whose  passion for justice was instrumental in establishing our Lutheran Advocacy Ministry here in New Mexico.

Past recipients of the award have been the following:
• Ivan Westergaard, supporter of Lutheran advocacy, leader in Albuquerque Interfaith
• And Carlos Navarro, New Mexico Coordinator for Bread for the World.

Now, Peace Lutheran Church, we recognize the steadfast advocacy work you have done. Since the first year of Lutheran advocacy in New Mexico 1984, you have been involved—both your clergy and the people of your congregation have supported us. 

Members of Peace had been leaders in our statewide ministry. Throughout our 32 years, there has always been a member of Peace on our Policy Committee.  But you didn’t stop there. You have an active, even a model, Bread for the World ministry advocating just policies to alleviate hunger in the United States and abroad.

Your members also have been active advocates in your community on matters affecting homeless children, immigrants, and others.

I also want to mention the Border Service Corps, a program your congregation-- relatively small at the time--had the courage to establish in the 1990s. The program provides opportunities for young people of various faith backgrounds-- from the U.S. and even abroad--to serve people on the U.S./Mexico border. Living simply together, earning only small stipends, they work in daycare programs for homeless children, in health clinics and ACLU offices, in Catholic Charities legal services, in food pantries, in Las Americas Immigrant Advocacy Center and more.

And finally, as advocates, they work toward systemic change.

In all these ways, Peace Lutheran Church, your faithful advocacy inspires us.
Read More..

Inside the Green house

Here are a few pics for the green house 
I now have a 650 litres aquaponics system which is doing well powered by over 100 fish. This system is been around for over a year and half now, during which time there was a lot of refining done to get the water flow work properly.
Recently I have added the vertical system to this which will be activated soon. This will up my productions capacity by 48 individual grow pots. With a little modification to the plumbing this vertical system is now integrated to the main 650 litres system.

The 250 litres new system is also just setting in, the nitrification cycle has just started and this system is powered by over 20 fish.

Wicking beds are doing good and I have had a few good harvest from this. So I have added a few more smaller wicking beds. Also this wicking bed gets water from my swirl filter which gets cleaned weekly.


Read More..

Observing International Peace Day

Although it may seem hopelessly distant, the dream of peace pulses in the lives of people everywhere.  UN Secretary-General Ban Ki-moon
Each year the United Nations and member nations observe International Day of Peace on the 21st of September. The theme of this year’s commemoration is “Partnerships for Peace – Dignity for All” which aims to highlight the importance of all segments of society to work together to strive for peace.

"Non-governmental organizations, faith-based groups and corporations all have a role to play in fostering social progress, protecting the environment and creating a more just, stable and peaceful world. The value of this collaboration is our theme for the Day: “Partnerships for Peace – Dignity for All,” said the UN.

Here are excerpts from a speech by UN Secretary-General Ban Ki-moon to commemorate this years International Day of Peace, which is held in conjunction with the 70th anniversary of the UN.

"I call on all warring parties to lay down their weapons and observe a global ceasefire. To them I say: stop the killings and the destruction, and create space for lasting peace. Although it may seem hopelessly distant, the dream of peace pulses in the lives of people everywhere....

We live at a moment of peril – but this is also an era of great promise. In a matter of days, leaders from across the globe will gather at the United Nations to adopt the 2030 agenda, our 15-year plan to achieve sustainable development. This is fundamental to ushering in a life of dignity for all, where poverty is history and peace is paramount.

On the International Day, as we mark the 70th anniversary of the United Nations, let us seize the opportunity achieve the Organization’s founding purpose: to save succeeding generations from the scourge of war."   Read full address
Read More..

What Selenium

A couple months ago, we noted that our soil had non-alarming levels of all the heavy metals tested for, except selenium.  The selenium level was 40x higher than background for our area, and possibly in the range that we would want to do something about it.  So we did some more digging (ha!) to verify if we did indeed have such high levels of selenium, find out if it is dangerous, and find out where it came from.

First, verification.  We sent soil samples to a second lab (more local, and cheaper for single-element heavy metal testing).  One sample taken with our fancy soil sampler tool, the other with a standard spade-dug hole from areas we knew we wanted to dig up.  The results came back: < 1 ppm selenium in both samples!

What?

That was unexpected!  But, it seems we have a bona fide controversy!  Get some popcorn, ye lovers of analytical chemistry-themed drama!

We should preface this discussion by saying that, since it wasnt exactly the same sample analyzed by both labs, its possible that we hit a pocket of high-selenium soil in the first sample and missed it in the second sample.  That is, both labs could technically be correct.  But...we think the 30 ppm number is erroneously high, as well explain below.

On the analytical side of things, the two labs used slightly different techniques.  Both labs digested the sample using nitric acid and hydrogen peroxide (to render it soluble and fully oxidize the selenium), and fed it into an inductively-coupled plasma (ICP).  But the output of the plasma was analyzed by atomic emission spectroscopy (AES) at the first lab, and by mass spectrometry (MS) at the second lab.  Both techniques suffer from plenty of spectral interferences (see here and here) in addition to the instrument-specific quirks that crop up with any piece of analytical equipment. There are ways of compensating for the spectral interferences, however, none of the known interferences are supposed to be able to increase instrument response from < 1 ppm to ~30 ppm.

Of the two labs, the second reported extensive quality control data, including blank runs (to make sure that no selenium is detected in a sample thats not supposed to have any), multilevel sample matrix spikes (where they add a known amount of selenium to our dirt and make sure the level increases by the amount they added), and standard control runs (where they run other materials with known selenium content to make sure selenium is detected at the expected level).  The first lab did not, but responded by email to say that they run two standard control samples per batch...one of which came back almost three times as high as it should have, and said that other samples in the same batch also showed elevated selenium levels.    But if it were random jumps in apparent selenium, its weird that both of our samples were so close to each other.  Did the other samples show up to 30 ppm selenium? We dont know. We asked enough questions that the first lab finally said to just send them another sample and theyd run it for free (not including shipping, of course).  We havent taken them up on the offer yet.  In any case, we were leaning toward higher confidence in the second labs (low selenium) results anyway.

Nevertheless, if the first lab was wrong, we wanted to know why.  So, we took to the interwebs to search for possible interferences from other components in our dirt that might not have been accounted for .  The first lab mentioned that they used the 203.985 nm emission line to measure the selenium, and we found an awesome tool from NIST that conveniently allows one to see what other elements might emit in the same range.  The general fertility test for our soil said we had really high levels of Mg, Ca, and P, so we started there.  But Ca has nothing in the right wavelength range, and Mg and P arent supposed to affect that the selenium measurement at that wavelength very much.  According to the first lab, molybdenum is the only known interference at that wavelength, but we couldnt find anywhere that confirmed that, or to what degree it interferes.

What the ICP-AES spectrum of our soil might look like in a perfect world, with equal concentrations of Mo, Se, and Ca, an instrument resolution of 0.035 nm, and no bcvkground noise.  If anyone wants to buy us an actual ICP, well gladly replace this figure with a real graph!

Unfortunately, there arent a lot of qualitative biological indicators that could help us differentiate 30 ppm selenium from 1 ppm selenium, either.  Sometimes selenium hyperaccumulators, such as some species of Astragalus and Stanleya, can be used to gauge if a soil is high in selenium, but our yard didnt have any of the hyperaccumulator species growing when we moved in, and selenium toxicity in most plants doesnt usually present itself until much higher selenium levels than 30 ppm. (Unfortunately, the numbers cited for selenium toxicity in wheat and peas in that article dont actually appear in the paper it cited!)  Similarly, we couldnt find any data suggesting that wed be able to notice defects in our soil invertebrates or other wildlife at 30 ppm.

Second, would it be dangerous anyway, even if we were at 30 ppm?  The first lab said possibly, quoting an EPA document that says 20 ppm is the threshold level at which they start to dig deeper into things like bioavailability (which depends on soil pH, soil sulfate content, the form of selenium in the original source, and other factors).  On the other hand, A&L Eastern Labs says not to worry about concentrations less than 50 ppm.  What about a local office?  We emailed the Colorado extension service, who said that the main risks in this area are forage plants that hyperaccumulate selenium, leading to toxicity in grazing livestock, but not normally vegetables grown for human consumption.  If it were accumulated to dangerous levels in our veggies, we would expect to see symptoms like brittle fingernails and hair, and we havent yet.

Third, where could it have come from? Most soil selenium comes from weathering seleniferous rocks, volcanic eruptions, coal burning, and metal refining.  We wondered if it might have been from spilled chicken feed, since we were dragging our chicken tractor around the yard with our extremely messy broilers last summer, and the chicken feed they spilled was fortified with selenium.  However, it turns out the FDA only allows 0.3 ppm selenium in poultry feed, which means that, unless our feed is mixed by scofflaws, wed have to have our soil essentially made out of composted chicken feed with very little selenium transport for that to be the main contributor.  The broilers were messy, but not messy enough to build up 8" of soil throughout the yard from spilled feed!

Final conclusions? The 30 ppm was a false positive.  Also, that was a lot of research hours spent to decide theres nothing to worry about.

Time to get back to the garden!

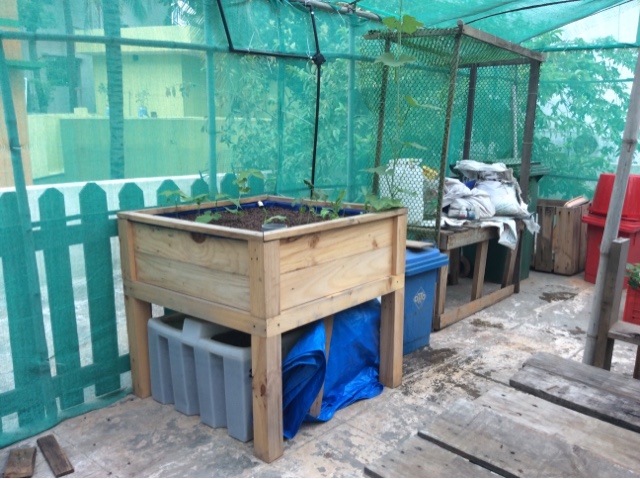
The garden in August: some late tomato blight, some powdery mildew, lots of raccoon, squirrel, and chicken damage, but no dangerous levels of selenium!


Read More..

Day to day Aquaponics

Day to day handling of fish and plants in the aquaponic system

Introduction

This experiment focuses on the day to day handling of fish and plants in your already established aquaponic system (please carry out experiments 1-3 of this teaching unit first). It gives you useful hints about monitoring the plants, the fish and the system as a whole.

Learning goals

  • Know what are the daily, weekly and monthly tasks when maintaining an aquaponic system
  • Know what is causing stress to fish and what to do about it
  • Be able to make a fish health check up by observing different body characteristics
  • Know what can make your plants ill and what to do about it
Day to day Aquaponics


Background information

Previous testing of the teaching unit showed that the classroom aquaponic system offers a large potential to arouse interest in food chains, ecosystems, and ecology in general. A model system with living fish and plants in a classroom, combined with the observation and care, can contribute to sensitise pupils to develop an understanding of sustainable systems.

The function of the aquaponic system can be combined in context with the entire ecosystem of the earth. Both can only exist, if environmental conditions are present, which allow all involved life forms to optimally thrive and to realize their role in the system. If certain components or entire partial systems were destroyed or arranged incorrectly, the entire system would not react over time as we would wish.

Time requirement

Usually a few minutes per day.

Material requirement

See experiments 1-3 of this teaching unit!

Lets start

A sound running aquarium has clear water, and the plants and fish are growing well and looking healthy. It is of great importance to compile a list of all the specific tasks and to make the pupils responsible for one or more.

Daily tasks
  • report time of feeding and amount of feed (daily amount of feed corresponds to 1-2 % of fish body weight).
  • observe the fish during feeding (for example: no fish eating / fish eat less than normal / fish eat normally / fish eat aggressively); observe fish that do not feed carefully and try to figure out why (are they too stressed by other fish / are they injured or sick?); maybe you can attract shy fish by feeding at several places at the same time.
  • check, if there are any dead or ill fish. This is best done during feeding time, at other times observe swimming behaviour and territorial range. A fish that is hiding has weaknesses.
  • check water temperature (it should be between 18-25°C, depending on fish species)
  • each second day: measure ammonia (tolerance value: < 0.8 mg/l) and nitrite (should be 0 mg/l at all times)
Weekly tasks
Some tasks dont have to be done every day but at least once a week:
  • plant control for pests (white flies, spider mite, cooties etc.) and disease
  • clear away rotten leaves
  • replace evaporated water
  • measure pH (tolerance value: 6.5 - 8); if you suspect a problem in water quality, measure immediately
  • measure nitrate (tolerance value: 10-100 mg/l)
Monthly tasks
Clean Aquarium thoroughly:
  • Suck away sediments from the bottom and between plants using a cleaning tube in a bucket, throw this water away and replace it.
  • Remove old and damaged plant leaves.
  • Control filter pump; if necessary, disassemble and clean the rotor with a tooth brush.
  • Control plant buckets. Important: no clogging of outflows, no anaerobic sludge concentrations, wash bucket completely, removing it from the system. Plant replacement can be done at any time, just not all biomass at once. Never clean all filter buckets at once: you could loose too many helpful bacteria.
ANIMAL PROTECTION ISSUES
Whenever fish are stressed during handling of the system they become vulnerable to injuries and diseases. Therefore, proper care at all times is important.

Cause of stress and how to reduce it
  • Poor water quality: Observe pH, ammonia, nitrate and nitrite as explained in Experiment 2. If the values are out of range, stop feeding or change half of the water volume.
  • Wrong water temperature: The water temperature of your tank should match the needs of the fish species. Make sure the aquarium isnt exposed to too much sunlight, for it will heaten up. Intensive lighting can cause a daily temperature fluctuation, too.
  • Low oxygen concentrations: When the fish start breathing hastily or they even swim to the surface and gasp for air, this is a sign for low oxygen concentration. Note that as the water temperature increases, the amount of dissolved oxygen in water decreases. Check ammonia and nitrite, if they are tolerable, pause feeding for two days and continue feeding on a reduced level. If they are out of range, change half of the water volume.
  • Sudden changes in water conditions: Within limits, most fish can adjust to sub-optimal water conditions. However, fish have difficulty adjusting to sudden changes in water chemistry. So try to avoid them whenever you have to dislocate a fish. This is the case when you buy new fish (see Exp. 3 "Establishing fish and plants..."), or when you change the water as a maintenance task.

    How do you proceed when changing the water? Only change part of the water, it is better to change more often but lower volumes than 80 % every six months. Over time, the water will get a yellowish/brown touch, indicating that humic acids, a residue of carbon breakdown, have accumulated. So you can take visual observations and smell as guiding criteria how often to change the water. With low fish biomass, it is probably enough to change a third of the water every month or you even might not have to change it at all. With higher stocking, it may be necessary to change a third of the water every week. If not for emergency cases, water change should not be intensified any further.
  • Diseases and injuries: Observe fish behaviour and make health check-ups as described below. Sort injured or sick fish out in a separate vessel to provide time to cure. Remember that this vessel needs proper filtering, too! Otherwise you could insert a plastic box into the aquarium, and keep it floating with styropor supports (drill holes into the sides to enable water exchange).
  • Stress due to incautious handling of the fish: Make sure not to injure the fish skin because the slime above the scales works as a microbial barrier between the body and the water. Only handle fish with wet nets and wet hands.
  • Escapes: Cover basins in a way that fish cant jump out of the aquarium (cover with glass, or better plastic coated metal grids: they are easier to adapt because of backflow water). When handling the fish, always keep them in a net in order to have a controlled grip on them.
  • Mixing of different species: Not all species of fish mix well with others. For example, most cichlids will eat smaller tank inhabitants. Peaceful fish will be stressed if kept with aggressive fish that chase them around all day. Ask your pet dealer, and heed his advise about mixing fish species.
  • Poor nutrition: Make sure, the diet is balanced and adapted to the fish species as described in experiment 3 ("Establishing fish and plants..."). Take any uneaten food out of the water and make sure not to overfeed the fish!


Aquaponics, ækw??p?n?ks, pisciponics http://aquaponics-commercial-backyard.blogspot.com.es/
Read More..

Kamis, 28 April 2016

On Monday, March 7, Bread for the World celebrated a successful  #BreadRising capital campaign with a dinner featuring powerful reflections by Rev. Carlos Malavé (Christian Churches Together), Gayle Smith (U.S. Agency for International Development), Kelvin Beachum (professional football player and anti-hunger activist) and Rev. David Beckmann (Bread for the World). Talented musician Joy Ike also performed and offered a short reflection. Three remarkable individuals who have helped Bread in many ways with their time, talent and treasure were honored: Bob Cahill, Bob Ayres and Pat Ayres. Here are some impressions of the evening through the tweets of a couple of people who attended the celebration.
Angela Ruprock-Schafer


Adlai Amor


(the afternoon before the celebration)
Read More..

Chickens Final Stats

On Sunday, we put our fall batch of chickens in the freezer, and now that weve had a chance to crunch the numbers and see how we came out in terms of yields and costs, we wanted to get the data out there for peer review.  First, a few general comments.  It was definitely worth it, for the meat, the experience, and the fertilizer that will go on the garden next year.  We raised almost 90 lbs of chicken in ten weeks, 60 of which went in the chicken tote Sunday morning.  That means Katie is even stronger than we thought!  The red ranger broilers had a 100% survival rate (at our elevation of 5600 feet), other than an incident with the new neighbor dog last Tuesday.*  We might try a batch of Cornish crosses in the spring, side by side with the red rangers for a direct comparison.  Wood chips worked well as a bedding, which, considering we can get them for free, and shavings are $6.99/bag, is good to know.  The chips are dustier, dont look quite as clean as the shavings, and wont break down in the compost as fast, but in our opinion, still come out ahead (chickens are inherently dusty anyway).  We just have to watch out for chips that might have cedar in them, since cedar can cause respiratory problems for the chickens.  Katie says she doesnt like that theyre also harder to spread than the shavings.

We had the eight-week weigh in a couple weeks back, which was a good comparison for how we were doing at the ten-week mark.  Next time, well track their weights through the whole cycle.

Comparison of each chickens weight at eight weeks, ten weeks, and dressed.
The graph shows a lot of interesting (to us, at least) info.  The first is that the chickens gained 15-20% of their final weight in the last two weeks.  The gimpy one, at the far left, gained almost 30%.  That is to say, it did much better once we were able to put it back with the rest of the flock.  If we could have let them go another week or maybe two weeks, they might have done even better.  For meat breeds other than Cornish crosses, a ten week butcher is pretty early.  Still, a number of the roosters were over the 6-lb mark, and the dressed weight came out to 66% of the final live weight, which is a pretty good yield ratio.  All of the birds made it into the traditional chicken weight classes, with the gray one and the gimpy one in the squab broiler class, the rest of the hens as fryers, and the roosters as roasters.  And, we can say from our initial impressions of the roasted meat and rendered stock, the flavor is awesome.

We had about a quarter bag left of our seventh 40-lb bag of feed, which means these 17 chickens consumed about 270 lbs of feed in total.  That works out to a feed conversion ratio of 3.09 for feed-to-final-live-weight and 4.67 for feed-to-dressed-weight.  Not Cornish cross-type numbers, but decent. 

The price per pound worked out to $7.05. (!!)  Kind of spendy compared to commercial-scale organic whole chickens, but again, these arent Cornish crosses.  Plus, we get complimentary garden fertilizer in the deal.  The pie chart below shows that by far the biggest expense is the (organic) feed, which at $34 per 40 lb bag adds up quickly.  Heck, thats almost as expensive as the organic oats we eat for breakfast, and thats people food!  Next round well experiment with buying feed in bulk or mixing, maybe even growing, our own grains.  In any case, if you want to know why organic meat is so expensive, there you have it!

Expenses associated with raising our fall chickens.  Electricity is from the heat lamp we ran while the chicks were very young and on cold nights.
Fresh in the cooler!
Ooh, that looks good.   Katie says, "No drooling on the camera!"

*We discovered the hard way that the fence around our yard was not completely dog-proof, and lost six chickens in the melee, including the little gray one.  Since the chickens were so close to butcher, we decided to see how badly damaged the meat was, and we were pleased to see that it was no more mangled than the meat we bring home on hunting trips.  So, we decided to put the birds in the freezer.  The warnings against eating the dog-killed meat are generally that 1. The dogs mouth might have bacteria or dirt or something that would contaminate the meat and 2. The chickens werent properly killed and bled out, so the meat wont be as high-quality as it would have been.  However, our take is that well be cleaning the carcass well and cooking it to well-done anyway, so bacteria and dirt dont worry us too much.  Also, to return to the hunting analogy, game animals are rarely killed in the way that chickens are butchered (but rather much more like the dog-killed chickens, with puncture wounds and laying in the dirt), and we consider game meat to be of sufficiently high quality to earn freezer space.  Plus, we met the dog and it seems healthy, other than an obsession with killing feathered things.  So, were comfortable putting those birds in the freezer and not wasting 35% of our chickens.  If we were selling them, it would be a different story.


Have you raised red rangers before?  How did your numbers compare to ours?  How did you cut down on feed costs?  Let us know in the comments section below!


Read More..
Photo: Twin Cities Bread team
Year after year, the leadership team in the Minneapolis-St. Paul area has put together great Offering of Letters workshops, maintained a website focused on the years letter-writing campaign and provided resources for churches in the area to organize their letter-writing Sundays (or weekends).

Here is the example that the Bread leaders in the Twin cities put together for the 2016 Offering of Letters, entitled "Survive and Thrive," which urges Congress to prioritize support for maternal and child health programs, emphasizing nutrition.


STEP 3 
Sincerely
Your Name
Address

STEP 4
Address your letter to Congress
U.S. House of Representatives, Washingon, D.C. 20515
 U.S. Senate, Washington, D.C. 20510
Read More..
By Karen Navarro
Every year at this time, Albuquerqueans call up social service agencies asking where they can serve Thanksgiving dinner, a way to give back to those who are less fortunate materially than they are. They may want to involve the whole family.

The truth is, the places that serve Thanksgiving dinner do not have to look for volunteers to serve the meal -- they already have more people offering to serve than they have places on the buffet line.

However, each year La Mesa Presbyterian Church, 7401 Copper Ave. NE (map), which serves a HUGE Thanksgiving meal, is looking for people to help with set-up, clean-up, and delivery of meals to people who are homebound. You can call the church office, 255-8095, and ask: “What can I do to help you out on Thanksgiving Day?”

Also each year, there is a huge project you can get involved with that provides food boxes to approximately 100 families during Thanksgiving week, when many students have inadequate nutrition while school is closed for the holiday. The project is directed by Help Equals Hope, a program of the 501(c)(3) non-profit organization called Americas Children. Visit their website to learn more about this organization. They work with teachers, principals, shelters and social workers to identify those they know who are in need of a Thanksgiving Week food box.

How can you help? By donating Smith’s or other grocery store gift cards for the purchase of turkeys and other food items – OR – by donating non-perishable food items and taking them to one of the five designated drop-off locations:
  • !Explora! at 1701 Mountain Rd. NW (map); 
  • GN Services, Inc. at 1425 Carlisle NE (map); 
  • Sports…Décor & More! at 1001 Yale Blvd. SE, Unit K (map) ; 
  • Sol Acting Academy at 5500 San Mateo NE, #114 (map); 
  • Outcomes, Inc. at 1503 University Blvd. NE (map). 
The deadline for drop-offs is Saturday, Nov. 21.

Food items requested: turkeys, stuffing, sweet potatoes, potatoes, canned vegetables, cranberry sauce, bread/rolls, chile, olives, rice, cereal, beans, gravy mix, desserts, drink mix, etc.

The easiest way to help organizers get enough turkeys is to buy a gift card at Smiths, Walmart, John Brooks or Albertsons, and drop it off at one of the five drop-off sites or mail it to:

Help Equals Hope
P.O. Box 66765
Albuquerque, NM 87193

Include a note saying “this is for the Thanksgiving food drive.”

Each year Help Equals Hope also holds a school supply drive in August, providing backpacks of school supplies for children whose parents cant afford to purchase them, and they gather monetary and in-kind donations year-round.

(The author worked at St. Martins Hospitality Center for 21 years, including her role as client advocate for much of that time. She continues to network with colleagues in homeless services).
Read More..

Feeding Bees with Bent Nails kind of

Were in the midst of a winter that isnt overly harsh, but that is following what apparently was an epically bad summer for honey production.  As a result, our bees went into the winter with less than one deep hive box, and were starting to look pretty hungry last weekend (judging by the weight of the hive).  We figured it was probably time to put some emergency rations out for them in the form of some no-cook candy.

We started making a candy board from the instructions here and here, but then realized our staple gun was out of staples!  Should we panic, run to the store and get some more staples?  Or should we practice a bit of whatchagotamology and make something to serve the same purpose, but thats even sturdier than those flimsy staples?  Wait--before you answer, consider this: weve also got a whole pile of bent-up nails, pulled out of free wood from Craigslist, that weve been itching to find a use for.  If you guessed the second option, congratulations.  Hooray for #2!

If wealth were measured in nails like this one, wed be rich!

We cut the head of the nail off, then the shank into two pieces.  Its possible to do this with just a pliers or wire cutter, but its a lot easier with a bolt cutter.  Also, the pieces dont go flying around as much with the bolt cutter, so if you go the pliers rout, wear safety glasses (and maybe a helmet).

We bent the two shank pieces into a generally parabolic shape using two pairs of pliers...

...then held onto each one with one pair of pliers and used the other to squeeze the parabola until the sides were parallel.  Sort of like taking a graph of a parabola and changing the independent-variable axis to a log scale.  Definitely use a pliers to hold the nail while squeezing.  If you use your fingers in place of the first pliers, they will force you to yell expletives when the second pliers slips off and squashes your fingers instead of the nail.

The resulting products are the head of the nail (any ideas for what to do with that?), and two beefy-looking staples that could be used to hold barbed wire onto a fencepost...

...or hardware cloth onto a candy board.

Heres what she looks like all together.  We smeared pollen on the top of the candy instead of making a proper patty like in the link above, mainly because we couldnt find the pollen until after we had the candy in the board.  It turns out one of those nonstick pie crust roller-outer mats is big enough to keep everything off the table while the candy dries, and also makes it pretty easy to unstick the candy board when dry.

This is the configuration on the hive: the candy board goes between the top deep box and the inner cover, hopefully right on top of the cluster. (But dont squash it!)  The moisture quilt is based off a design like this.

What is your setup for emergency bee feeding in the winter?  Let us know in the comments section below!


Read More..